Introduction
Embarking on a gardening journey can be both exciting and challenging, especially for beginners. In this multi-part blog series, we will explore common (I think) newbie mistakes I have made and been making as I embark on my gardening journey and provide valuable tips I think that can help you avoid them. Let’s dive into Part 1 of the series.
Disclosure
This blog post contains affiliate links. I might earn from qualifying purchases. Please note that the use of affiliate links does not affect the price you pay for any products, and I only recommend products that I have personally used and found helpful in my gardening journey.
Not starting planting early on
When it comes to planting crops, many experts suggest starting 4-6 weeks before the last frost date. However, if you have access to a greenhouse, you could start even earlier. Unfortunately, I wasn’t aware of this and followed the general guidelines. In hindsight, I could have started as early as January or February, allowing me to enjoy a bountiful harvest by June or July.
Instead, I find myself still planting in June due to other mistakes I’ve made and still making along the way. Don’t repeat my error; if you have a greenhouse, kickstart your gardening journey ahead of time, which also allows you to fail early and learn from them. Please note that starting early may require additional care and attention, especially with regards to temperature and humidity control.
Keeping seedlings in pots for too long
Another mistake I made was keeping my seedlings in intermediate pots for an extended period of time. I usually use about 0.5 – 0.8 litre pots as my intermediate pots, but I failed to realize that these small pots restrict the growth and development of plants; this is particularly noticeable with tomatoes. To prevent stunted growth, I recommend limiting the time seedlings spend in intermediate pots to no more than a few weeks to a month maximum. If you started early in colder months, this duration can be slightly longer.
For plants intended to be grown in the greenhouse, consider moving them from the tray to the ground immediately. This advice might be different for tomatoes, as it growing a good stem length first is beneficial in an intermediate pot before transplanting to it’s permanent site; that’s a discussion for another blog. By avoiding prolonged periods in small pots, you’ll maximize growth potential and save valuable time.
Not knowing thy Tomato types
When I decided to grow tomatoes, I had no idea there were different types, particularly determinate and indeterminate varieties. I planned my greenhouse around indeterminate tomatoes; as I assumed all tomatoes grew large and long. To source my seeds, I used a fresh, tasty tomato (likely of the vine variety) purchased from Lidl. Little did I know, the tomato I selected was determinate. While this wasn’t necessarily a bad thing, as I appreciated their compact size and ability to fit in smaller spaces, compared to indeterminate ones which is very useful in my case.
I also got to learn about the fact commercial growers use determinate ones more, due to compact size and they all bear fruits at the same time; so harvesting and planning is much easier. Indeterminate varieties produce fruit over a more extended growing season, making them ideal for personal greenhouse cultivation. Next time, I will ensure to use both varieties and plan my greenhouse layout accordingly to accommodate their distinct characteristics.

Thinking Pigeons are harmless to your crops
As I transplanted my cabbages, cauliflower, and broccoli into the grow bed, I felt a sense of accomplishment. However, my joy was short-lived when I woke up the next morning to find most of my seedlings decapitated. Initially, I blamed a cat that frequently visited my garden for the destruction. But to my surprise, I discovered pigeons were the true culprits. Determined to protect my hard work, I initially thought of creating a scare crow but I quickly searched online and found a suitable netting solution on Amazon. I purchased it and temporarily covered my crops to deter the pigeons.
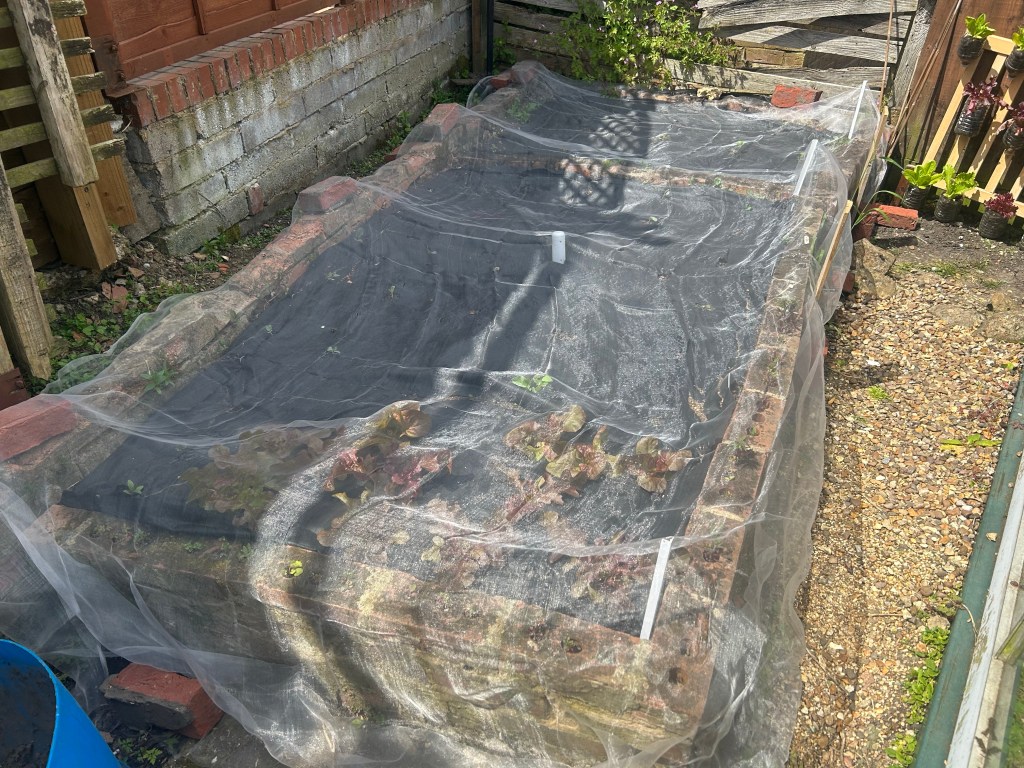
Putting net directly on your crops
While the net successfully kept the pigeons at bay, it inadvertently caused another problem: stunted vegetable growth. I mistakenly assumed that as the plants grew, they would push the net upward. However, the net’s presence exerted stress on the vegetables, hindering their growth for several weeks.
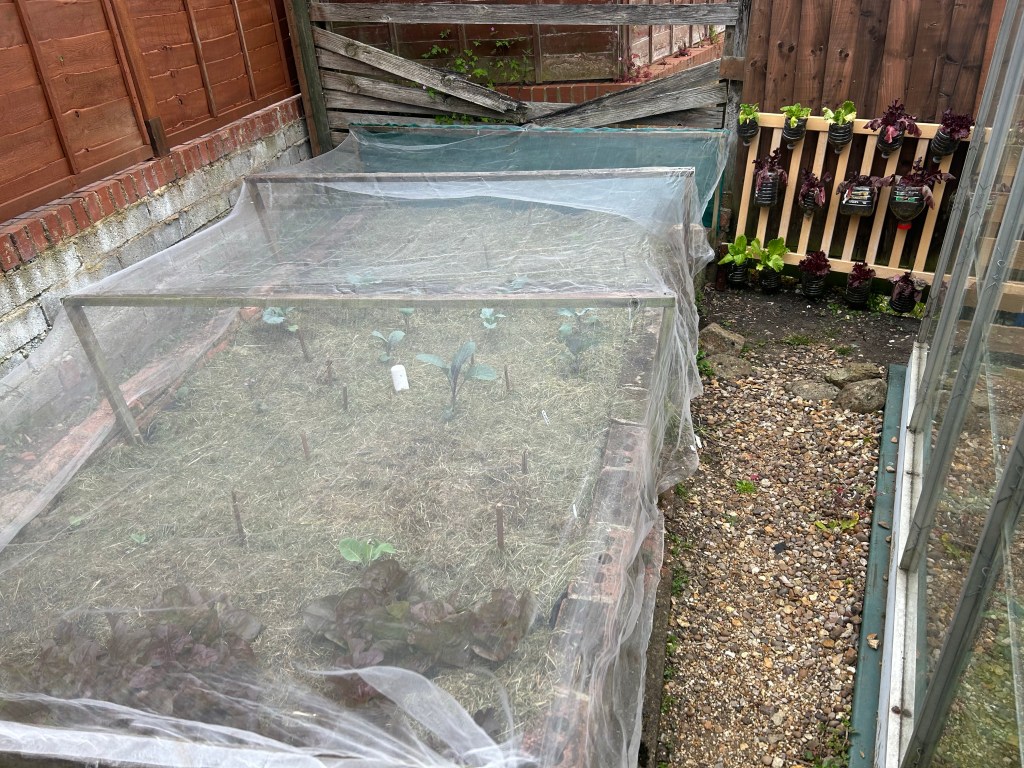
Surprisingly, only the lettuce seemed unaffected by the net’s pressure (maybe because they were already close to maturing). Other crops like cabbages, carrots, broccoli, and cauliflower experienced stunted growth due to the direct contact with the net. To avoid this issue, ensure that the netting is positioned above the crops, allowing them ample space to grow naturally.
Conclusion
In Part 1 of this blog series, we’ve explored some common mistakes I made as a gardening newbie and shared valuable tips to help you avoid them. By starting planting early, being mindful of seedling pot transitions, understanding tomato types, and protecting your crops from pigeons while maintaining healthy growth, you’ll set yourself up for a successful gardening experience. Stay tuned for Part 2, where we’ll continue our discussion on other crucial aspects of gardening for beginners.

2 responses to “Gardening Mistakes and Tips to Avoid Them (Part 1)”
[…] Gardening Mistakes and Tips to Avoid Them (Part 1) […]
LikeLike
[…] Gardening Mistakes and Tips to Avoid Them (Part 1) […]
LikeLike