• About
    • Contact

Gardening, Tech and DIY

  • Why I think Everyone should get into Gardening: A Path to Mental and Physical Well-Being

    Aug 30th, 2023

    Introduction

    In today’s fast-paced world, where technology and constant connectivity drive us, the need to occasionally disconnect for the sake of our well-being cannot be underestimated. Amidst it all, there exists a simple yet profoundly rewarding activity that offers the much-needed respite – gardening. The act of cultivating and nurturing plants goes beyond merely beautifying our surroundings, or filling our belles with food; it’s a transformative journey that bestows immense joy, nurtures mental well-being, and even contributes to physical health. Join me as we embark on a journey to uncover the myriad reasons why gardening is a treasure trove of benefits, waiting for everyone to unearth.

    The Delightful Journey from Seed to Harvest

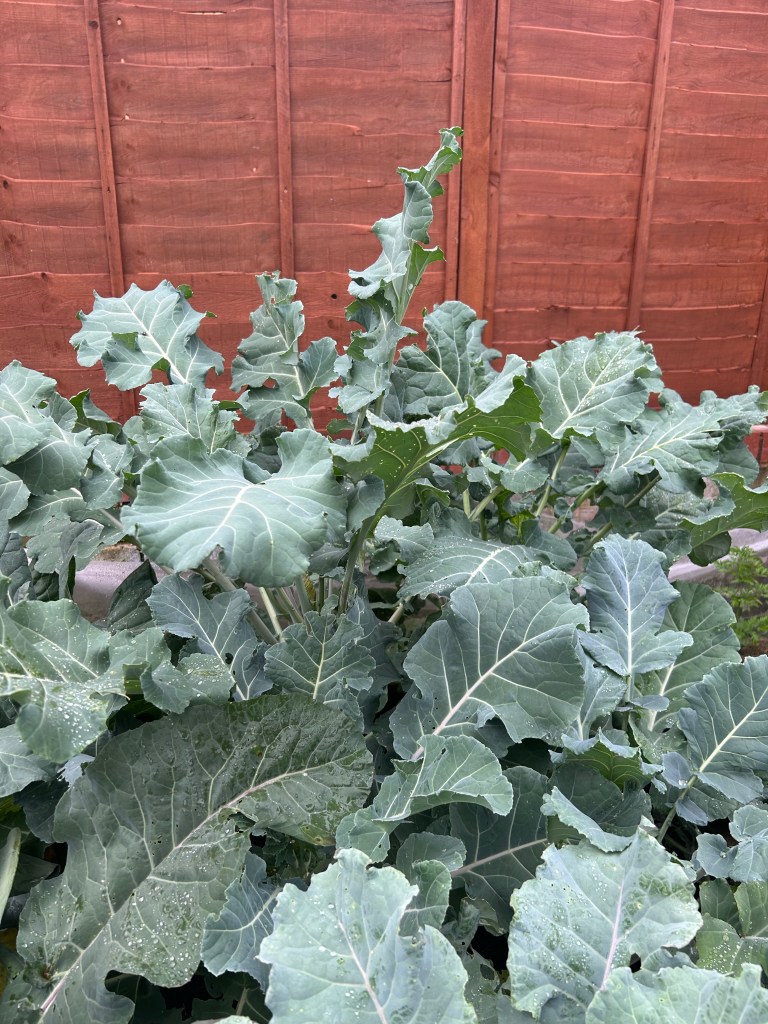
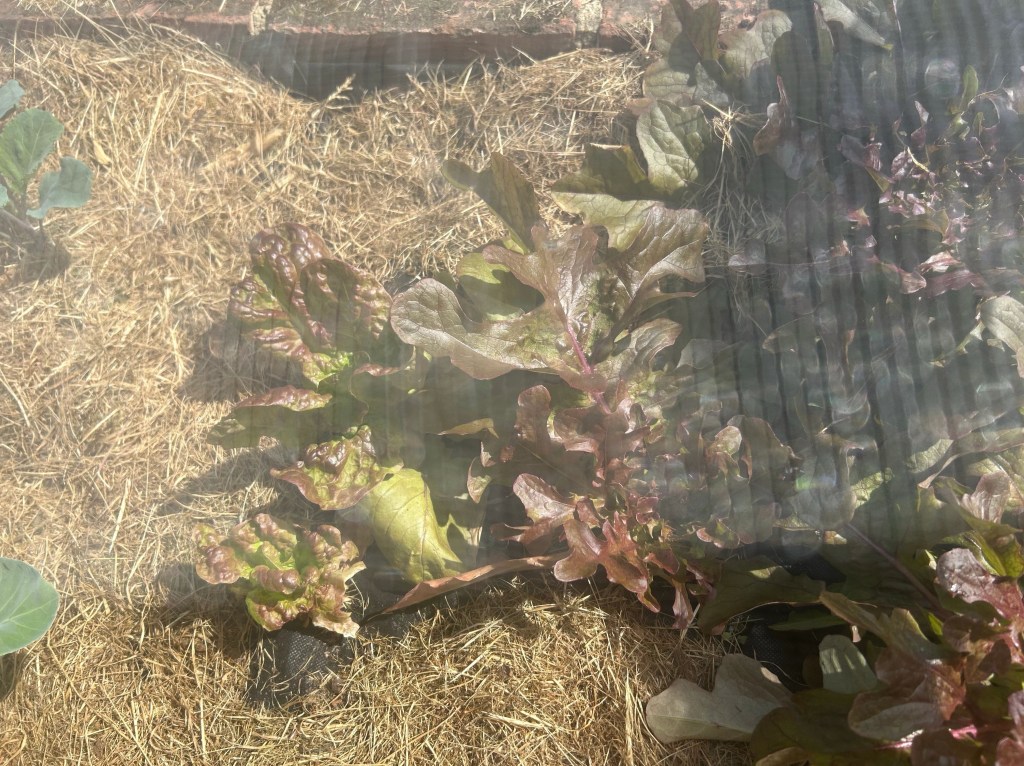
    In the garden, a magical transformation unfolds – the journey from a tiny seed to a thriving plant adorned with vibrant blooms or succulent fruits. The sight of this metamorphosis ignites an unparalleled sense of joy. The fulfilment that accompanies caring for these plants, observing them flourish under your attentive watch, and eventually savouring the literal “fruits of your labour” is a reward like no other.

    Gardening and Mental Well-Being

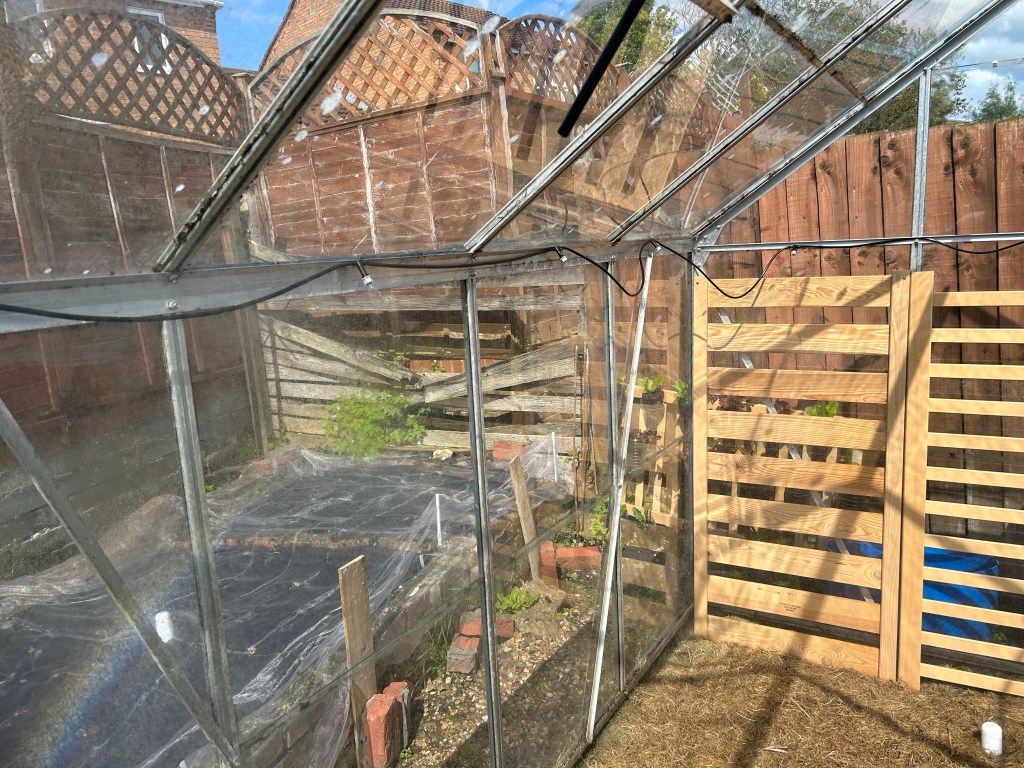
    In a world often burdened with stress and anxiety, gardening offers me a therapeutic escape. Delving into the soil, planting seeds, and nurturing plants provides a serene refuge for calming the mind. The rhythmic routine of tending to the garden promotes mindfulness, allowing worries to dissipate and making room for positivity to flourish. Moreover, the embrace of nature’s beauty acts as a mood enhancer, a natural balm for the pressures of daily life. Personally, whenever work stress becomes overwhelming, a stroll to my greenhouse is a rejuvenating remedy that never fails.

    A Physical Workout Wrapped in Greenery

    As someone who doesn’t naturally gravitate towards exercise, the thought of traditional workouts can be exhausting. Yet, for individuals like me who find conventional exercise routines daunting, gardening offers an alternative route to physical health. Activities like digging, planting, weeding, and watering engage muscles, elevate heart rates, and enhance flexibility. Engaging in these tasks within the garden’s nurturing environment transforms what would be a chore into a fulfilling endeavour, making consistency a joy rather than a struggle.

    Connecting with Nature

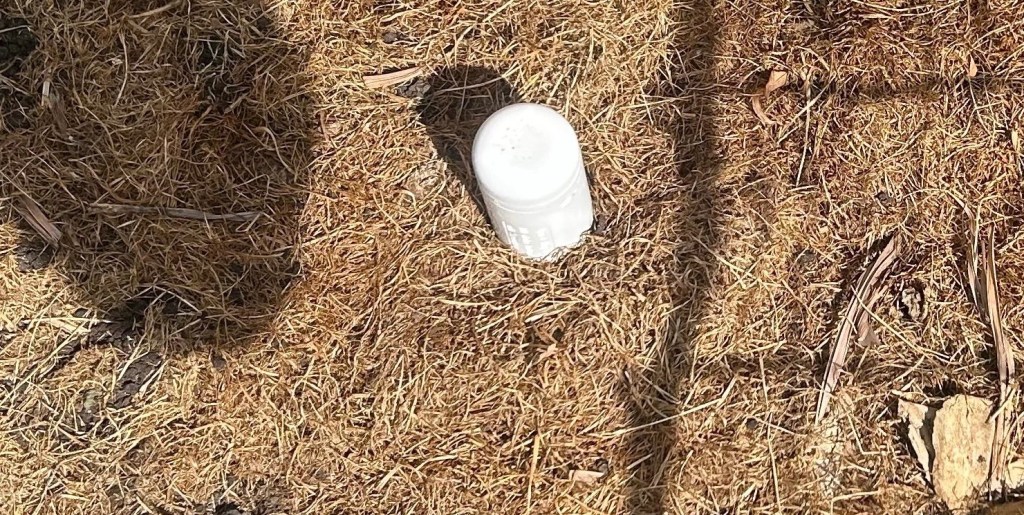
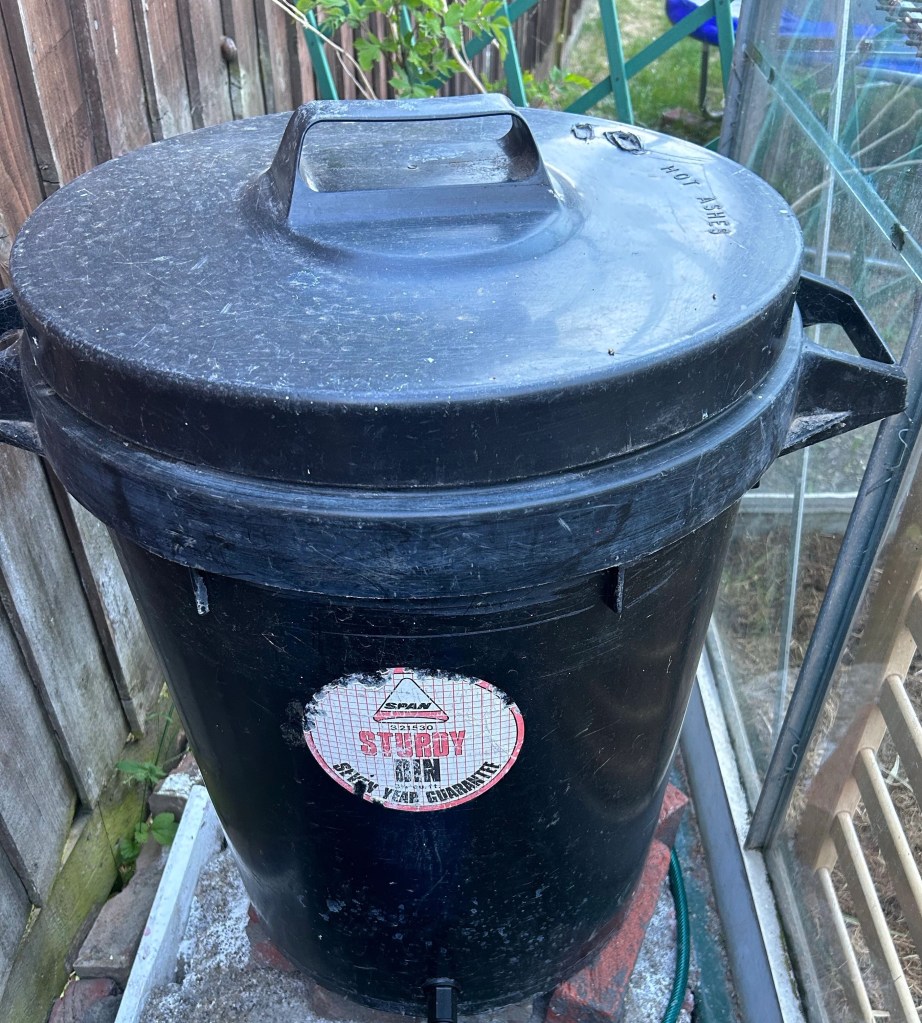
    Gardening for me is a direct avenue to reconnect with the natural world. Nurturing plants deepens my understanding of changing seasons, the significance of nurturing, and the intricate balance of life. An enlightening moment came from realizing how pivotal the Sun is to our existence as humans, through its importance to plant growth and the subsequent sustenance of the food chain. This connection also fostered a responsibility for the environment, sparking sustainable practices that benefit not only my garden but the planet as a whole. Furthermore, I’ve become more mindful of recycling, particularly repurposing food waste as nourishment for plants and local wildlife.

    Nurturing Your Creativity

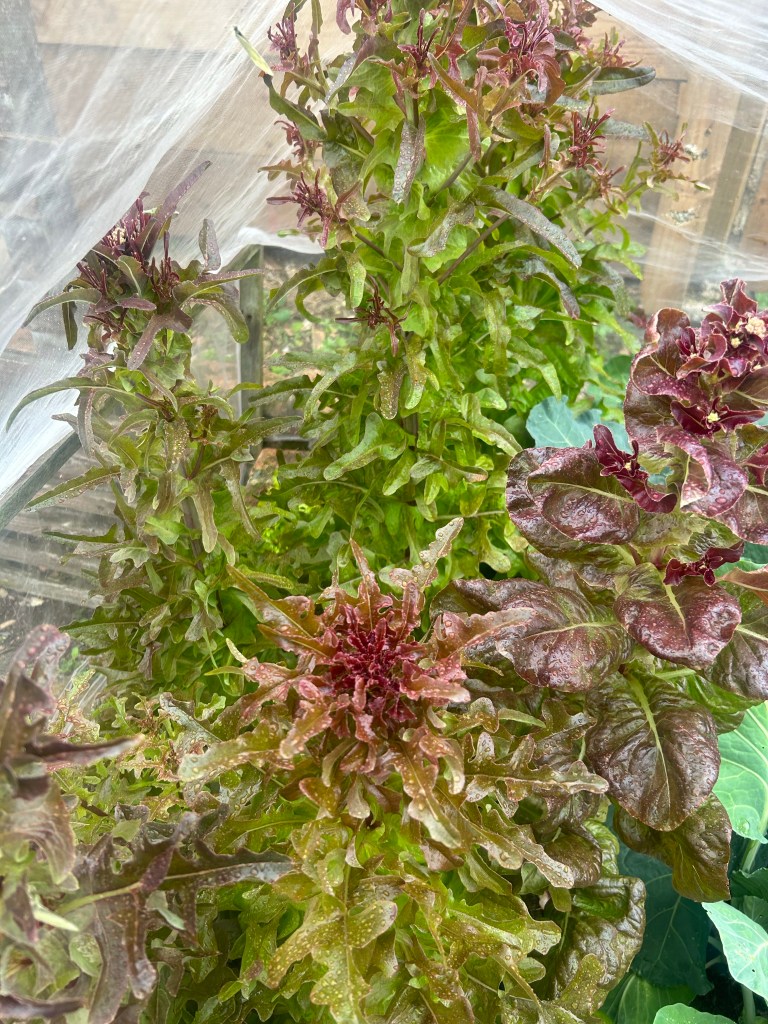
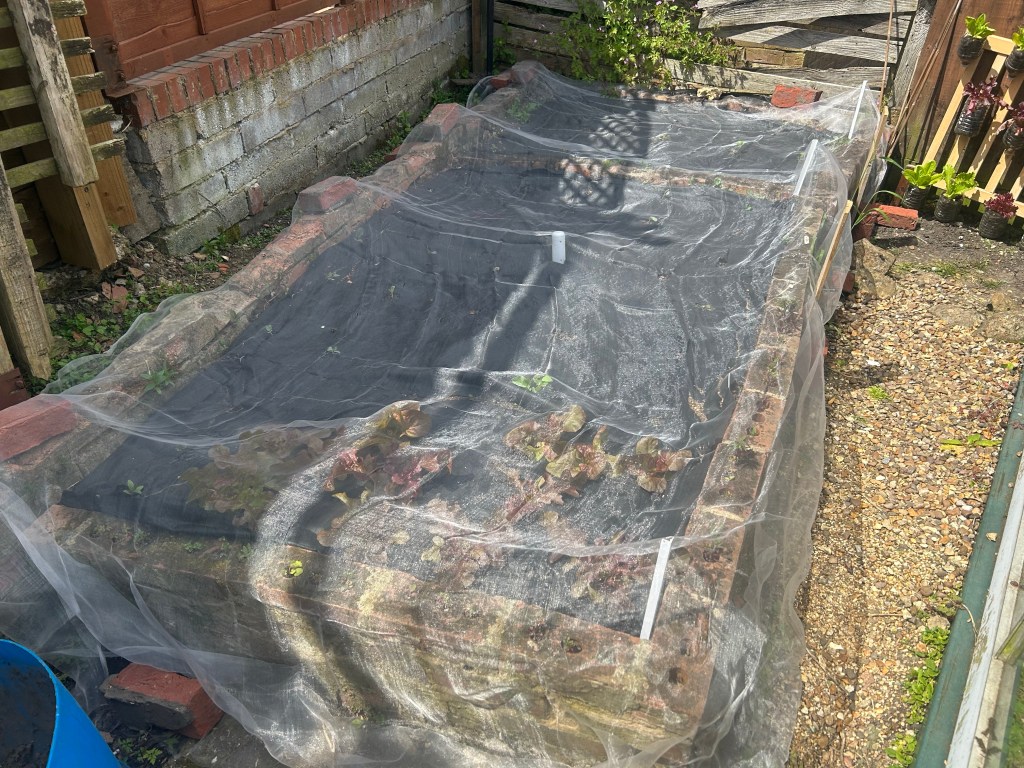
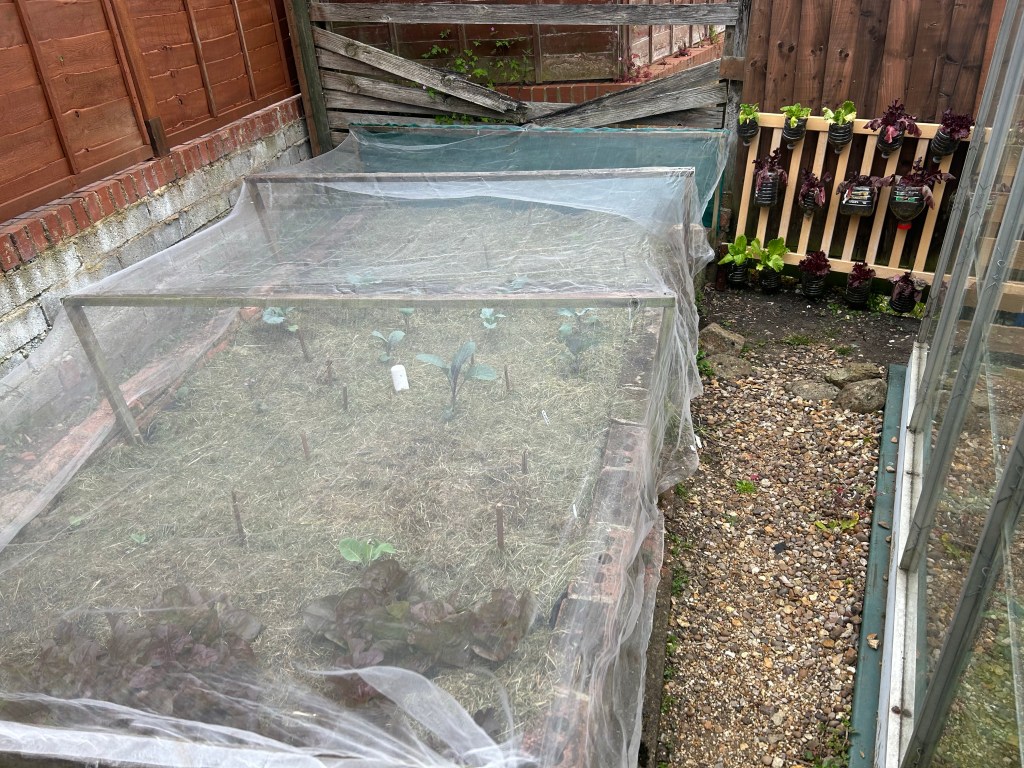
    Gardening is an art form, and for me, integrating technology into the process amplifies this creative dimension. It’s akin to wielding a canvas where colors, shapes, and textures are embodied by plants. Crafting the layout of my garden unleashes a surge of creativity, as I experiment with various arrangements, plant pairings, and decorative elements. Even though my focus leans towards fruit production, the very arrangement of crops to optimize yield is an art form in itself. Whether it’s a small balcony garden or a sprawling backyard haven, the power to design a space that reflects your personality and elicits joy lies within your grasp.

    Conclusion

    Amidst a world that incessantly demands hustle, gardening extends an invitation to tranquility. It serves as a sanctuary to escape the constant demands, a realm where the wonders of nature are close at hand, promoting mindfulness and embracing the physical rewards of a fulfilling endeavour. Whether you’re a seasoned gardener or pondering the leap into this enriching journey, always remember that a garden is more than a collection of plants – it’s an oasis of well-being awaiting your exploration.

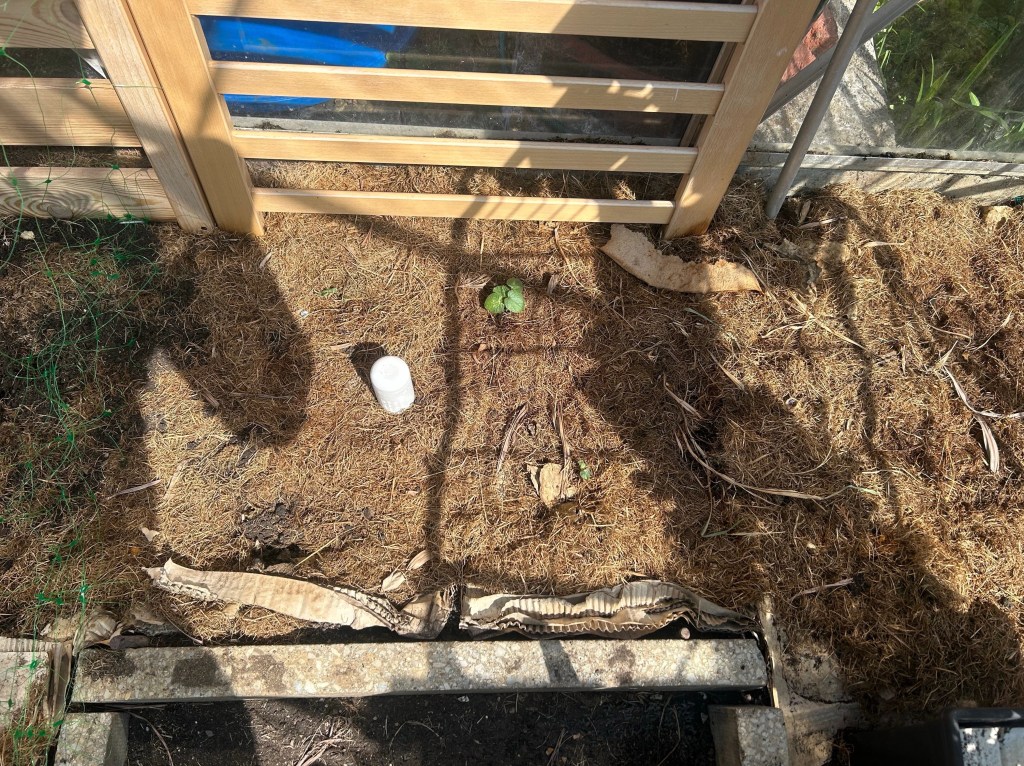
    Gardening is a journey open to all, regardless of your experience level. If, after reading this, you find yourself intrigued by the idea of gardening but uncertain about where to begin, remember that you don’t need an expansive yard or elaborate setup to dive in. Starting small, perhaps with a few plants in pots, is an excellent way to dip your toes into this world. Watching those initial seedlings sprout and thrive right in your own backyard is a magical experience that ignites a passion for nurturing life. The key is to take that first step, and I’m confident that once you do, you’ll discover the immense joy and fulfilment that gardening brings. So why wait? Let the journey begin, and may your garden be the canvas of well-being that you nurture and enjoy!

    If you are experienced, I invite you to share your own gardening experiences in the comments below. After all, the world of gardening is brimming with benefits that continuously unfold, providing joy and enrichment to all who engage in this cherished activity. Happy gardening!

  • How I Monitor and Maintain Optimal Conditions in my Greenhouse

    Aug 23rd, 2023

    Introduction

    When looking after live plants, it is essential to ensure they grow well and yield a bountiful harvest. As a passionate gardener, and a tech enthusiast at the same time, closely monitoring the conditions within my greenhouse was a no brainer; for it gave me the opportunity to merge two things I love doing. It provided me with the ability to create an ideal environment for my plants, reducing stress and maximising their growth potential.

    In this blog post, I will share my insights on how I monitor and maintain the conditions in my greenhouse. In caring for a greenhouse, there are three primary conditions I pay close attention to: temperature, humidity, and soil moisture content. These factors play a vital role in the overall well-being of the plants. Monitoring and controlling these conditions contribute to their health, productivity, and resilience.

    Disclosure

    This blog post contains affiliate links. If you click on an affiliate link and make a purchase, I may earn a commission at no extra cost to you. Please note that I only recommend products and services that I have personally used and found valuable in my gardening journey.

    Conditions

    Temperature

    The temperature of a greenhouse is a critical factor that affects not only the plants but also the moisture levels within them. When the temperature rises too high, plants can experience heat stress, causing wilting, reduced growth, and even damage to their cellular structure. Conversely, when temperatures drop too low, plant growth can slow down, and frost or freezing temperatures may harm sensitive plants. It is crucial to maintain optimal temperature levels throughout the day and night to provide an environment conducive to healthy plant development. It is said the best temperature range for the greenhouse is between 18 to 24 degrees. Usually when the temperature of my greenhouse gets quite high, my system automatically turns on the fan, and I am instructed to open the doors if closed.

    Fan used in my Greenhouse
    Buy on Amazon

    Humidity

    Maintaining the right humidity levels within a greenhouse is equally vital. Humidity affects not only the plants themselves but also the moisture content in the soil. Low humidity can lead to increased moisture evaporation from both plants and soil, potentially damaging the crops. It can cause wilting, stunted growth, and nutrient deficiencies. On the other hand, excessive humidity can create a damp environment that fosters the growth of mold, mildew, and fungal diseases. Proper humidity control ensures optimal moisture balance for plants, promoting healthy growth and preventing the onset of diseases. It is said the best humidity range for a greenhouse is between 40 to 80%. When the humidity gets very low, my misting system automatically comes on to increase it. You can read about my misting system below:

    How I built my Misting System

    Soil Moisture

    Adequate soil moisture is essential for plant health as it serves as the primary source of water and nutrients. Insufficient moisture can result in drought stress, wilting, nutrient deficiencies, and reduced growth. Insufficient moisture also hampers the soil’s ability to deliver nutrients effectively to the plant’s roots. However, overwatering can be equally detrimental, leading to poor oxygen availability in the root zone and root rot. Striking the right balance is crucial to provide plants with sufficient hydration without suffocating their roots. Due to mulching, I hardly have any issues with soil moisture, so it’s been consistently stable. But if needed, the same misting system will be activated to raise it up.

    Conditions Monitoring

    To effectively monitor these conditions, I have developed my own system using market-bought sensors and software integration. Here’s how I utilise sensors for each condition:

    Humidity and Temperature

    I use a single sensor to track both the humidity and temperature conditions of my greenhouse, ensuring the sensor is placed in a spot that is central to the greenhouse. This allows me to make informed decisions about ventilation, shading, misting and heating (in future) to maintain optimal temperatures and humidity for plant growth. This sensor is placed closer to the roof of the greenhouse, so I get the readings at the top as the heat rises.

    Humidity and Temperature Sensor
    Buy on Amazon

    Soil Moisture and Temperature

    Utilising soil moisture sensors, I can accurately gauge the moisture content within the soil. These sensors help me determine the right watering schedule and avoid under or overwatering. The data collected allows me to optimize irrigation practices and ensure my plants receive the right amount of moisture for healthy growth. This sensor also comes with a temperature senor, which I use to know the temperature of the soil at the ground level closer to the plants.

    Soil Moisture and Temperature Sensor
    Buy on Amazon

    Door and Window

    The greenhouse has a door (or course), and a top vent window which is unfortunately not under my control. The top window vents makes use of a mercury based lever to open and close it, which is dependent on the heat in the greenhouse. I also have sensors on the door and window, which reports to me when the vent/door is opened. So if for example the greenhouse is very hot and the door is closed, I am informed to ensure its opened.

    Visualizing and Analysing the Data

    With the help of software integration, all sensor data events are collected, streamed to a server to be stored in a database and then analysed in real-time. This allows me to have a comprehensive overview of the greenhouse conditions at any given moment. The software also provides valuable insights, trends, and customizable alerts, enabling me to take immediate action when necessary.

    Monitoring and adjusting these crucial greenhouse conditions based on sensor data significantly improves the overall health and productivity of my plants. It minimizes stress, optimizes growth, and maximizes the potential for a successful harvest.

    Grafana Used to visualize the Data

    Alerting and Control

    When there is an issue, or the state of the monitored condition is bad, I get alerted of what is going on. Also I don’t think I like the idea of the misting system completely running on its own (at least not yet), depending on what is going on; though if the condition is extreme, it handles it on its own. Even every morning watering, I have it ask me if to go ahead as sometimes I might have watered them the previous evening using fish waste. So since I need a way to be reached no matter where I am, I needed a way to be accessible by my system and send instructions back when needed.

    For this reason I integrated the Telegram messaging platform into my automation system, so via it I can be alerted of what is going on and take action based on conditions. Telegram allows to create bots on the platform, which can be programmed to interact with users. This gives the ability to send commands back (call back commands) from within a chat with a bot, which can be replied to via inline buttons made available by the bots.

    My interaction with my Greenhouse over Telegram

    There are instances I am right within the greenhouse, and I just want to switch on/off the fan or misting system manually. Having to bring out my phone just to do this, of course is not really convenient while I am in there. For this reason I also integrated a push button, that when pressed the systems can be controlled if one is right within the greenhouse.

    Push button controls and my pump.

    To make the control of all these things possible, I have a power device controller which is kept within the above shown waterproof electrical box. Its essentially a WiFi development board (NodeMCU), running a open source firmware on it (Tasmota) with some custom configuration, and connected to a relay board. The setup allows to be controlled wirelessly (remotely), or via local switches. I purchased the momentary switches, drilled the required holes into the box and fitted them in. The switches are also waterproof, ensuring they don’t get bad due to occasional high humidity in the greenhouse. Links to the board, relay and switches can be seen below.

    Buy NODEMCU
    BUY RELAY BOARD
    Buy Switches

    Software Components

    This section is for the geeks that might be interested in what software components are being used, to run the setup:

    ComponentUsed for
    AppdaemonAutomation framework, and the brain behind everything. Collects, processes and stores all data, while making decisions based on them
    TasmotaOpen source firmware for ESP devices
    Zigbee2MqttTransforms the data from the devices using the zigbee protocol, and restreams them using the MQTT protocol
    InfluxDBTimeseries Database, used to store the processed data from the sensors
    Eclipse MosquittoMQTT broker, used for intersystem communication over the network
    GrafanaFor observability, visualisation, and analysis. Also used for setting up some alerts
    TelegramThe ChatBot, used for communicating with me and receiving instructions back
    Software components used for managing the setup

    Conclusion

    Closely monitoring and maintaining optimal conditions in my greenhouse for me is vital for successful plant growth. By monitoring temperature, humidity, and soil moisture content, I can create an environment that nurtures healthy plants and hopefully maximizes my harvest. Investing in sensors and software integration allows for accurate and real-time monitoring, empowering me to make informed decisions and take timely actions. Also cannot remove the fact its just so much fun.

    There is still some work to be done though, as since my misting system uses a water reservoir, there is need to know real-time the water level. This will prevent the pump from running, when the water level is too low and inform me of the situation. As stated above the top vent window is out of my control, well needs to get under my control. I got an extractor fan I bought for the greenhouse, have not figured out yet how to install it since its all glass. So watch this space for updates, as I go via solving these various issues.

    Lastly remember, every greenhouse is unique, and experimentation will help you fine-tune your monitoring system to suit your specific plants and local climate. Embrace the process of learning, adapting, and refining your greenhouse management techniques to unlock the full potential of your gardening endeavours. If you have any questions, or have tried something like this, do kindly put it in the comment section, so we all can learn from your experience. Happy gardening!

  • Gardening Mistakes and Tips to Avoid Them (Part 3)

    Aug 17th, 2023

    Introduction

    Welcome back to Part 3 of our blog series on gardening mistakes and tips for beginners. In our previous blogs, we delved into the mishaps and lessons I’ve encountered in my gardening journey, aiming to offer insights to help you steer clear of these pitfalls. If you haven’t had the chance to catch up, you can find Part 1 and Part 2 here:

    Gardening Mistakes and Tips to Avoid Them (Part 1)

    Gardening Mistakes and Tips to Avoid Them (Part 2)

    In this installment, we continue to explore my gardening adventures, uncovering the valuable lessons I’ve learned along the way. Join me as I share personal experiences and practical tips, offering you guidance to navigate your own gardening path more effectively.

    Not Using a High Enough Net to Protect Plants

    In a previous instalment, I stressed the importance of using protective nets to shield plants from hungry birds and pesky pests. However, a significant revelation dawned upon me: raising the netting to a sufficient height is just as crucial. To my chagrin, I underestimated my plants’ growth, leaving the net inadequately positioned. This oversight created an open invitation for pests, allowing them to lay their eggs, which in turn unleash their destructive larvae upon my crops. Learning from this since I don’t want to use any chemicals, my commitment for the future is to construct a taller net framework, ensuring comprehensive protection. In a serendipitous turn, this framework can also morph into an impromptu greenhouse—simply by swapping the net for a transparent covering.

    My Broccoli growing way taller than expected
    A section of damaged cabbages by pests

    Using Non-Decomposable Fabric Mulch

    Though fabric mulches are serviceable, my preference has shifted towards organic alternatives like grass chippings and cardboard. Unlike fabric, these materials naturally decompose, enriching the soil in the process. Fabric mulches on the other hand, demand more meticulous management and lack the flexibility to accommodate plant growth. For example when I wanted to plant more seedlings, the process of cutting the mulch in the right size and all, was just too much work. Even after opting for grass chippings as a cover, I find myself tasked with the additional chore of removal of the fabric mulch for compost application.

    Delaying Tomato Pruning

    A valuable lesson was underscored when I neglected the timely pruning of my tomato plants. Admittedly, I fell into the trap of assuming that intensified fertilization could compensate for the lack of pruning; and really wanted to experiment it really. This misconception translated into a chaotic profusion of offshoots and a dense foliage canopy. Consequently, my well-intentioned aim of nurturing a modest ten tomatoes per plant faced a significant setback, as the excessive growth hampered the ripening process. If I didn’t prune, each plant would have had more than 10 times that; I know newbie mistake.

    Reliance on Misting System Alone

    This is blog post, I wrote about how I built my misting system for my greenhouse. The efficacy of my misting system in managing temperature and hydration is undeniable. However, the journey also illuminated its limitations. The accumulation of mist on leaves occasionally precipitates drooping due to the additional weight. Moreover, the application of water droplets to leaves and their subsequent fall can result in disparate soil moisture, presenting the risk of uneven hydration or “hot-spotting”. In response, my solution involves the integration of a low-level water sprinkler, a project inspired by a developing fish pond filter system I am working on. So since I will be using some water drums for the filter, will simply have the waste supplied to the greenhouse.

    Overextending Lettuce Growth

    Reflecting on what I wrote in part 2 of this series, where I emphasized my alternative approach of continual leaf harvesting instead of complete uprooting for lettuce cultivation. Regrettably, I underestimated the potential for lettuce to grow to towering heights (who knew?). The unintended consequence of this exuberant growth was the emergence of a bitter taste, negating the very essence of this delightful vegetable. This experience underscores the importance of timely intervention in managing lettuce growth.

    Really tall lettuce plants

    Conclusion

    In the tapestry of gardening, each misstep has woven valuable lessons. From adjusting net heights to guard against pests, to embracing organic mulches for sustainable growth, these experiences have illuminated the path to nurturing thriving gardens. The unwieldy growth of tomato plants reminded me of the importance of timely intervention, while the limitations of misting systems highlighted the beauty of adaptation. The bitterness of overgrown lettuce leaves underscored the significance of nature’s timing. As we close this chapter, let’s embrace these lessons, knowing that amidst challenges, gardens flourish, and life’s lessons bloom.

    So what has your gardening journey been like? Do add it in the comments, and let us share our journey in this wonderful experience of growing our own food. In the mean time, do stay tuned for Part 4, where we’ll continue to share insights, experiences, and tips. Happy gardening!”

  • The Joy of Gardening with My Daughter

    Jul 19th, 2023

    Introduction

    As a passionate gardener and a proud father, one of the greatest sources of happiness in my life is sharing the wonders of gardening with my daughter. Together, we venture into the great outdoors, tending to plants, and immersing ourselves in the beauty of nature. In this blog post, I want to highlight the numerous benefits and the profound impact it has on both of us. I’ll also discuss the steps I’ve taken to ensure her safety during our gardening adventures, including the use of specially designed kids gloves. (Note: As a disclosure, this blog post contains an affiliate link to the gloves.)

    Planting the Seeds of Appreciation

    Introducing children to gardening at an early age instils in them a deep appreciation for nature and its magnificent ability to create and sustain life. By involving my daughter in gardening, I help her develop a sense of wonder and respect for the environment. We discuss the beauty of watching seeds sprout, witnessing plants grow and flower, and the importance of caring for our surroundings.

    Creating Lasting Memories

    Gardening with my daughter allows us to create beautiful memories that we will cherish for a lifetime. From planting her first seed to harvesting her first vegetable, these experiences strengthen our bond and provide opportunities for quality time together. We laugh, learn, and explore the intricacies of nature, fostering a connection that extends far beyond the garden.

    Nurturing Responsibility and Patience

    Gardening teaches valuable life lessons, such as responsibility and patience. As my daughter tends to the plants, she learns the importance of consistency, commitment, and nurturing. She witnesses the rewards of her efforts as she witnesses the plants thrive under our care. These lessons translate into other areas of her life, helping her develop essential qualities for personal growth.

    Ensuring Safety and Encouraging Independence

    Ensuring my daughter’s safety is a top priority when gardening together. I have taken specific measures to create a secure environment, such as removing sharp tools from her reach and educating her on potential hazards. Additionally, I have provided her with specially designed kids gloves, which not only protect her hands but also make her feel like an active participant in the gardening process.

    My girl helping the dad fill a planting tray
    Buy on Amazon

    Promoting Environmental Awareness and Health

    Gardening instils in children an understanding of the interconnectedness between their actions and the environment. By teaching my daughter to care for her surroundings, she learns about the importance of preserving and protecting our planet. Moreover, spending time outdoors and engaging in physical activity while gardening contributes to her overall health and well-being.

    Conclusion

    Gardening with my daughter is a source of immeasurable joy and fulfilment. Through our shared experiences, we bond, learn, and grow together while cultivating a love for nature and the environment. By ensuring her safety, providing her with the right tools, and guiding her through the wonders of gardening, I am confident that I am nurturing her passion for the natural world and helping shape her into an environmentally conscious individual. Together, we are sowing the seeds of appreciation, responsibility, and lifelong memories that will continue to blossom throughout her life.

  • Why I am Considering Building an Aquaponic System

    Jul 5th, 2023

    Introduction

    In recent years, the concept of aquaponics has gained significant attention as a sustainable and efficient method of cultivating plants. As an avid gardener seeking environmentally friendly alternatives, I have found myself drawn to the idea of building an aquaponic system in the near future. Not only that, I am really looking forward to applying technology in helping me manage the entire setup. In this blog post, I will explore what aquaponics entails, highlight its advantages over traditional hydroponics, and discuss why I believe my existing fish pond and sun-drenched south-facing garden provide an ideal foundation for this innovative gardening approach.

    Understanding Aquaponics

    Aquaponics combines aquaculture (fish farming) and hydroponics (soil-less plant cultivation) in a mutually beneficial symbiotic system. In simple terms, the waste produced by fish is converted into nutrients that nourish the plants, while the plants naturally filter and purify the water, creating a balanced ecosystem. Right now I don’t even have a filter for my fish pond anyway, so the thought of using this to clean my pond gives me more reasons to venture into it. This closed-loop system reduces the need for chemical fertilizers and promotes sustainable food production.

    Aquaponics vs. Hydroponics

    While hydroponics allows for efficient plant growth in a controlled environment, aquaponics takes it a step further by integrating fish cultivation. Here are a few reasons why aquaponics has an edge over traditional hydroponics:

    • Natural Fertilization: In aquaponics, fish waste serves as a natural fertilizer for plants. Unlike hydroponics, which relies on synthetic or commercial fertilizers, aquaponics provides organic nourishment to plants, resulting in healthier and more flavourful produce if done right.
    • Enhanced Sustainability: Aquaponics embodies the principles of sustainable agriculture. By using fish waste as a nutrient source, we minimize waste and create a self-sustaining ecosystem that conserves resources and reduces environmental impact.
    • Ecosystem Resilience: The integration of fish and plants creates a resilient ecosystem that can adapt to changes. The plants help filter and cleanse the water, creating a healthier environment for the fish. Additionally, the presence of fish in the system introduces the potential for additional protein sources.

    Utilizing Existing Resources

    One of the main reasons I am drawn to aquaponics is the compatibility with my existing fish pond and my sun-drenched south-facing garden. Here’s how these elements come together to support my aquaponic endeavours:

    • Fish Pond as a Nutrient Source: By utilizing the fish waste from my existing pond, I can effectively recycle and repurpose it as a natural fertilizer for my plants. This synergy reduces waste and maximizes resource efficiency.
    • Vertical Gardening for Space Optimization: With limited ground space, the vertical gardening aspect of aquaponics becomes invaluable. By growing some plants vertically against my back wall, I can make efficient use of the available sun coverage and maximize my growing area. This allows me to reserve precious ground space for crops that are better suited for traditional cultivation.
    • Organic Approach: By avoiding the use of commercial liquid fertilizers, I can ensure that my aquaponic system remains as organic as possible. The reliance on fish waste for plant nutrition aligns with my desire to ensure I keep to sustainable and chemical-free gardening practices.
    A Section of my Back Wall at 7am in the morning

    Conclusion

    Building an aquaponic system offers a range of benefits, from sustainable food production to space optimization and organic gardening practices. With the integration of my existing fish pond, a sun-drenched south-facing garden and some technological innovations, I am excited to embark on this journey and explore the potential of vertical gardening while utilizing the natural synergy between fish and plants. I know Its not going to be easy, and I can see its going to be a lot of work as a new greenhouse will need building. I will also be investing in additional fish to supplement my pond’s population, as having just 2 little ones will not be enough. But I believe by doing this, I can create a thriving ecosystem that provides nourishment for both plants and animals, all while contributing to a greener and more self-sufficient lifestyle.

  • How I Feed My Plants: Organic Methods for Optimal Growth

    Jun 28th, 2023

    Introduction

    As an aspiring organic gardener, I have discovered effective organic feeding methods that provide my plants with the nourishment they need to thrive. In this blog post, I will share my personal approach to utilising banana peels and eggshells, as well as fish waste, to create nutrient-rich concoctions that promote robust plant growth.

    Banana Peels and Eggshells Combo

    When I started my gardening journey, I was looking for a cheap way to get my plant food that didn’t entail me purchasing anything. It was to my delight in my research, I came across the benefits of the banana peels and egg shells combo. In my home, we consume a significant number of eggs and bananas, which inspired me to explore their potential as organic plant food. Combining banana peels and eggshells creates a potent mixture that benefits plants in the following ways:

    Banana Peels

    Being rich in phosphorus and other essential nutrients, banana peels provide crucial elements for plant growth. They contain potassium, magnesium, and calcium, which promote root development, flowering, and fruit production. Additionally, the organic matter in banana peels enhances soil structure and moisture retention.

    To prepare this beneficial mixture, I do the following:

    • Collect around 3-4 banana peels.
    • Rinse the peels to remove any pesticide residue (when I remember).
    • Cut the peels into small pieces for easier blending.
    • Blend the banana peels with 6-8 crushed eggshells using a blender.
    • Blend until you achieve a smooth consistency.
    • Transfer the mixture into an empty 2L milk bottle (well got kids, so go through a lot of milk bottles) and allow it to ferment for at least a week before application. Mine usually last for up to 4, since I use them only every 2 weeks. Not yet noticed an adverse effect as at the time of writing.

    Eggshells

    Eggshells are an excellent source of calcium, a vital mineral for plant growth and cell development. Calcium strengthens cell walls, helps prevent diseases, and facilitates nutrient absorption. By incorporating eggshells into the organic manure, this provides an essential mineral supplement for the plants.

    Stash of milk bottles with the mixture

    Harnessing the Power of Fish Waste

    In addition to the banana peel and eggshell mixture, I also utilise the nutrient-rich waste produced by my fish pond to feed my plants. The banana peels and egg shells mixture doesn’t really give the plants enough nitrogen, and so I supplement this using the fish waste. Fish waste, particularly their ammonia-rich excretions and leftover food, provides an abundant source of nitrogen and other vital nutrients for plant growth.

    Here’s my process for utilising fish waste:

    • As my fish consume food, they produce waste in the form of ammonia, enriching the water with valuable nutrients.
    • Once a week, I collect a portion of this nutrient-rich water from the fish pond.
    • I use the collected water to nourish my plants, ensuring they receive a sufficient nitrogen supply.
    • In the future, I plan to possibly construct a fish pond filter to efficiently gather fish waste, especially the leftover food, for an enhanced plant feeding regimen.

    Conclusion

    By adopting my personal approach to organic plant feeding, which involves utilising the powerful combination of banana peels and eggshells, as well as incorporating fish waste from my pond, I have witnessed remarkable growth and vitality in my plants (at least so far). These sustainable practices not only benefit my garden but also contribute to an environmentally friendly approach to gardening. Embrace these methods and enjoy the flourishing beauty of your plants. Happy gardening!

  • Gardening Mistakes and Tips to Avoid Them (Part 2)

    Jun 21st, 2023

    Introduction

    Welcome back to Part 2 of our blog series on gardening mistakes and tips for beginners. Last week, we did explore some of the mistakes I have made, and been making in my gardening journey, so that you could be better informed and either you avoid them or rectify them if already made them. You can read part one of the series below.

    Gardening Mistakes and Tips to Avoid Them (Part 1)

    In this instalment, we will continue exploring the mistakes I made as a newbie gardener and the valuable lessons I learned. Join me as I share my experiences and provide tips to help you navigate your gardening journey more effectively.

    Cardboard-only Mulching

    I remember the first time I heard the word “mulch”. I was discussing my greenhouse’s dryness with my younger brother, a fellow gardening enthusiast (I guess it runs in the family), and then he suggested mulching as a solution. I did some research into it, and excited to find an affordable option, I decided to give cardboard mulching a try. Cardboard mulching is great, and it is even ranked better than wood chips. But little did I know that using cardboard alone had its limitations. As the cardboard got wet and dried out, it reverted to its thick state, leaving the soil exposed.

    To overcome this issue, I discovered two effective solutions. The first involves shredding the cardboard into smaller pieces before using it as mulch. While this method requires extra effort (which I was honestly not in the mood of doing), it helps the cardboard integrate with the soil more effectively. The second option is layering organic matter, such as grass clippings, on top of the cardboard. Luckily I have a good space with natural growing grass, and as I lawnmowed I gathered the chippings and placed on the cardboard. This combination created an ideal mulch that retains moisture, improved soil health, and prevented weed growth. This had an added benefit, as the grass chippings help boost the Nitrogen level of the soil as it decomposes. I also noticed that a lot of micro organisms began to flourish under the mulch, which really excited me for somewhere that was so dry it was giving out dust. By adopting these techniques, you can create a nurturing environment for your plants to flourish.

    Cardboard and Grass Chippings Mulch

    Using Hydrophobic Soil to Plant Seeds

    One of the amusing mistakes I made was unknowingly using hydrophobic soil to plant my seeds. Before I embarked on my gardening journey, I never imagined that soil could become hydrophobic. It was only when my seeds failed to germinate despite regular watering that I realized something was amiss. Upon investigation, I discovered that the soil had become water-repellent, hindering proper moisture absorption. It was strange that regardless of how I watered the soil, it never penetrated beyond 2mm into the soil.

    To rectify the situation, I had to dispose of the affected soil and ensure that the new soil was thoroughly soaked before planting the seeds. For those that I had luckily planted within a big growing pot, I poured an ample amount of water into the pot and gently stirred the soil to break up any hydrophobic pockets. This had an adverse effect as the soil could become baked when dried again, but this was prevented by watering constantly. While this method worked for some seeds, it’s important to note that some seeds may have become non-viable over time and I had to dispose of some.

    Harvesting Lettuce by uprooting it

    One of the first crops I was privileged to harvest was Lettuce, and was very happy to do it; but in the process made a common mistake when harvesting it. I used to uproot the entire plant, not considering the long-term consequences. This led to a scarcity of lettuce, as I preferred picking fresh leaves from the garden when needed. However, I soon discovered a better approach. Instead of uprooting the lettuce, I started trimming the leaves I wanted to consume while leaving the roots intact. By adopting this method, the lettuce plants regrew their leaves, ensuring a continuous supply. For example, if I had 14 lettuce plants, by the time I finished harvesting from the 14th plant, the first plant would have replenished its leaves. Although I’m still unsure of how many times this process can be repeated, I will update you in a future blog post as I gather more information.

    Harvested Lettuce already regrowing

    Using Paper Growing Pots Indiscriminately

    One of my experiments involved using paper growing pots, which I discovered through a YouTube video on how to effectively grow okra. The idea was to bury the entire pot in the ground when transplanting crops like okra, eliminating the need for a separate transplanting step due to its sensitive nature. However, I overlooked the importance of humidity and the challenges it posed when combined with my hydrophobic soil issue.

    The paper pots dried out the soil faster and hindered the growth of my okra plants. It wasn’t until I switched back to using regular growing trays that I achieved better results. If you decide to use paper growing pots, it’s crucial to consider using it when there is high humidity levels, especially during the colder months. There could be added benefits too, as paper pots can offer better insulation than plastic pots, but they require a suitable environment to thrive and support plant growth effectively.

    Underestimating the importance of the Sunlight

    We have heard it said, that plants use the process of photosynthesis to convert light to chemicals that they need for their growth. I don’t think I ever really properly understood the importance of this process, and by extension sunlight in plant growth until I started gardening. I gained a deeper understanding of this fact during my gardening journey. Observing the stark difference between plants exposed to direct sunlight and those in shaded areas was a revelation. It became evident that photosynthesis, the process by which plants produce their food, heavily relies on sunlight. To ensure optimal plant growth, it’s essential to position your plants in areas where they can receive a minimum of 5 hours of direct sunlight per day. Certain light-loving plants like tomatoes may require up to 8 hours. Providing adequate sunlight promotes vigorous growth, lush foliage, and bountiful harvests.

    Conclusion

    In this second instalment of our gardening series, I shared additional mistakes I made as a novice gardener, and provided tips I believe can help you avoid them. Remember, mulching with cardboard requires additional measures to prevent exposure and promote soil health. Be mindful of hydrophobic soil when planting seeds, and consider alternative approaches to ensure successful germination. Instead of uprooting lettuce plants, opt for trimming leaves to facilitate continuous harvests. Approach paper growing pots with caution, taking into account humidity levels and transplanting challenges. Lastly, never underestimate the importance of sunlight in your plants’ growth and productivity.

    Stay tuned for Part 3 of our blog series, where I will continue to share insights, experiences, and valuable tips to help you become a more confident and successful gardener. Happy gardening!

  • Gardening Mistakes and Tips to Avoid Them (Part 1)

    Jun 14th, 2023

    Introduction

    Embarking on a gardening journey can be both exciting and challenging, especially for beginners. In this multi-part blog series, we will explore common (I think) newbie mistakes I have made and been making as I embark on my gardening journey and provide valuable tips I think that can help you avoid them. Let’s dive into Part 1 of the series.

    Disclosure

    This blog post contains affiliate links. I might earn from qualifying purchases. Please note that the use of affiliate links does not affect the price you pay for any products, and I only recommend products that I have personally used and found helpful in my gardening journey.

    Not starting planting early on

    When it comes to planting crops, many experts suggest starting 4-6 weeks before the last frost date. However, if you have access to a greenhouse, you could start even earlier. Unfortunately, I wasn’t aware of this and followed the general guidelines. In hindsight, I could have started as early as January or February, allowing me to enjoy a bountiful harvest by June or July.

    Instead, I find myself still planting in June due to other mistakes I’ve made and still making along the way. Don’t repeat my error; if you have a greenhouse, kickstart your gardening journey ahead of time, which also allows you to fail early and learn from them. Please note that starting early may require additional care and attention, especially with regards to temperature and humidity control.

    Keeping seedlings in pots for too long

    Another mistake I made was keeping my seedlings in intermediate pots for an extended period of time. I usually use about 0.5 – 0.8 litre pots as my intermediate pots, but I failed to realize that these small pots restrict the growth and development of plants; this is particularly noticeable with tomatoes. To prevent stunted growth, I recommend limiting the time seedlings spend in intermediate pots to no more than a few weeks to a month maximum. If you started early in colder months, this duration can be slightly longer.

    For plants intended to be grown in the greenhouse, consider moving them from the tray to the ground immediately. This advice might be different for tomatoes, as it growing a good stem length first is beneficial in an intermediate pot before transplanting to it’s permanent site; that’s a discussion for another blog. By avoiding prolonged periods in small pots, you’ll maximize growth potential and save valuable time.

    Not knowing thy Tomato types

    When I decided to grow tomatoes, I had no idea there were different types, particularly determinate and indeterminate varieties. I planned my greenhouse around indeterminate tomatoes; as I assumed all tomatoes grew large and long. To source my seeds, I used a fresh, tasty tomato (likely of the vine variety) purchased from Lidl. Little did I know, the tomato I selected was determinate. While this wasn’t necessarily a bad thing, as I appreciated their compact size and ability to fit in smaller spaces, compared to indeterminate ones which is very useful in my case.

    I also got to learn about the fact commercial growers use determinate ones more, due to compact size and they all bear fruits at the same time; so harvesting and planning is much easier. Indeterminate varieties produce fruit over a more extended growing season, making them ideal for personal greenhouse cultivation. Next time, I will ensure to use both varieties and plan my greenhouse layout accordingly to accommodate their distinct characteristics.

    Determinate Tomatoes in my Greenhouse

    Thinking Pigeons are harmless to your crops

    As I transplanted my cabbages, cauliflower, and broccoli into the grow bed, I felt a sense of accomplishment. However, my joy was short-lived when I woke up the next morning to find most of my seedlings decapitated. Initially, I blamed a cat that frequently visited my garden for the destruction. But to my surprise, I discovered pigeons were the true culprits. Determined to protect my hard work, I initially thought of creating a scare crow but I quickly searched online and found a suitable netting solution on Amazon. I purchased it and temporarily covered my crops to deter the pigeons.

    Net used to cover vegetables
    Buy on Amazon

    Putting net directly on your crops

    While the net successfully kept the pigeons at bay, it inadvertently caused another problem: stunted vegetable growth. I mistakenly assumed that as the plants grew, they would push the net upward. However, the net’s presence exerted stress on the vegetables, hindering their growth for several weeks.

    Surprisingly, only the lettuce seemed unaffected by the net’s pressure (maybe because they were already close to maturing). Other crops like cabbages, carrots, broccoli, and cauliflower experienced stunted growth due to the direct contact with the net. To avoid this issue, ensure that the netting is positioned above the crops, allowing them ample space to grow naturally.

    After raising the net

    Conclusion

    In Part 1 of this blog series, we’ve explored some common mistakes I made as a gardening newbie and shared valuable tips to help you avoid them. By starting planting early, being mindful of seedling pot transitions, understanding tomato types, and protecting your crops from pigeons while maintaining healthy growth, you’ll set yourself up for a successful gardening experience. Stay tuned for Part 2, where we’ll continue our discussion on other crucial aspects of gardening for beginners.

  • How I Built my DIY Misting System for my Greenhouse

    Jun 11th, 2023

    Introduction

    One of the nicest things to have in the garden, especially for an aspiring big-time gardener like myself, is a greenhouse. When our newly purchased home came with an 8 x 6 feet glass and aluminium constructed greenhouse, complete with an electrical socket, I couldn’t contain my excitement. Despite its neglected state, with dry soil and dirty glass, it was still a greenhouse, and that alone made me love the house the more.

    As summer rapidly approached, the need to water my plants became more involved. I wanted a way to automate the watering process, and this desire led me to embark on building a DIY irrigation system. The first decision I had to make was choosing between a sprinkler and a misting system. After careful consideration, I opted for a misting system.

    Not only did I want to regulate soil moisture, but I also wanted to control the overall humidity inside the greenhouse; for I wanted to experiment with growing some plants that do not readily grow in the UK. Additionally, misting provides a wonderful cooling effect during scorching hot days, far superior to mere sprinkling. In this blog post, I will show how I designed and built it step by step.

    My system watering my plants

    Disclosure:

    Before we begin, please note that this blog post contains affiliate links. If you make a purchase through these links, I may earn a commission at no additional cost to you. These commissions help support the maintenance of this blog and the creation of valuable content. Thank you for your support, now let’s get into it.

    Planning and Research

    Before diving into any DIY project, it’s important to plan and conduct thorough research. In my case, one of the challenges I faced was the distance between the external tap and my greenhouse. To overcome this, I needed a water reservoir. Luckily, the previous owners had left behind an ashes bin, which turned out to be the perfect solution. It was tough, thick, black and came with a lid to cover it up well.

    Gathering the Materials

    To create a misting system that works, I gathered several essential materials. Here’s a list of the items I purchased, including their links to where they can be purchased on Amazon and eBay:

    • Misting Nozzles
    • High-Pressure Pump
    • 10mm Inner Diameter Tube
    • 12mm Inner Diameter Hose (Garden Standard)
    • 10mm to 12mm Hose Connector
    • 4mm to 10mm Hose Connector
    • Water Reservoir (repurposed Ashes Bin), if wanting to buy a water butt, here is one
    • Pressure Pump Power Supply
    • Water Butt Tap
    • Female Hosepipe connector

    In some instances, one might be able to find a complete package that can be purchased that comes with the pump, nozzles and connectors. Outside the fact these options are most times more expensive than getting them individually, for this use case they don’t come with the level of flexibility I wanted; for example, where my pump was situated in the greenhouse, and linking it to the nozzles. Also the tap I used was specifically chosen, so I can easily unplug the pump’s hose to fetch water into my watering can if I need to with ease.

    Water Reservoir Setup

    To ensure a steady water supply, I repurposed an ashes bin left behind by the previous owners (which I have no use for) as a water reservoir. Positioning the reservoir near the greenhouse served a dual purpose. Not only did it provide easy access to water for the misting system, but it will also allowed me to collect rainwater. This was a fantastic alternative to using chlorinated tap water, as rainwater is naturally free of chemicals and better suited for watering the greenhouse.

    Repurposed Ashes bin as Water Reservoir

    Calculations and Testing

    To ensure the pump had the right pressure and litres/minutes to support my system, it was crucial to calculate the required PSI (pounds per square inch) for the high-pressure pump. Based on the number of misting nozzles and the inner diameter of the connecting pipes, the following formula was used:

    PSI = (Flow Rate per Nozzle × Number of Nozzles) / (Cross-Sectional Area of Connecting Pipe)

    Generally misting nozzles have an average flow rate of 1 gallon per minute (GPM) and I had 12 nozzles, and the connecting pipe has a 4mm inner diameter, I then calculated the required PSI as follows:

    PSI = (1 GPM × 12) / (π × (4mm/2)^2)

    So in my specific case, with 12 nozzles spaced by 2 feet of 4mm pipe, the minimum needed PSI for effective misting would vary. However, as a general guideline, a minimum PSI of 30-40 is recommended for misting systems. This ensures that the water is properly atomized and distributed evenly across the greenhouse. Regular testing and adjustments are essential to fine-tune the system and achieve the desired misting effect.

    Assembly and Installation

    Now, let’s move on to the assembly and installation process:

    1. Installing the misting nozzles: I positioned the misting nozzles along the designated area in my greenhouse, ensuring they were evenly spaced. Then sealed the end of the last nozzle chain to prevent any water leakage.
    2. Attaching the water butt tap: I drilled a hole at the bottom of the ashes bin, and securely attached the water butt tap. This allowed to control the water flow from the reservoir to the pump, and fetch water directly when needed.
    3. Connecting the hoses: I attached a female garden hose connector to the standard 12mm garden hose, and connected it to the water butt tap. Cut out two 1 meter length tubes from the 10mm tube pipe. Used the 10mm to 12mm hose connector to attach one of the 10mm tube to the 12mm garden hose. Then, using the 4mm to 10mm hose connector, attach the other 10mm tube to the 4mm pipe of the misting nozzles.
    4. Connecting the tubes to the pump: Next connected the 10mm tube linked to the garden hose to the water inlet of the high-pressure pump. Then finally connected the other 10mm tube to the outlet of the pump.
    My Greenhouse with the installed Nozzles

    Conclusion

    I hope by following this step-by-step guide, you are inspired to successfully build your own DIY misting system for your greenhouse. From purchasing the necessary materials to assembling and then testing the system. Via this, you can create a refreshing environment that will support the growth and well-being of your plants. Control of the system is as simple as controlling the power to the pressure pump, thanks to the electrical power already installed in the greenhouse.

    However, that’s not all! In an upcoming blog post, I will show you how I automated the control of the power to the pump. This exciting addition will allow the system to come on at specified times, and I even integrated a local push button in the greenhouse for manual control. As part of my wider home automation setup, I can also control the misting system via Telegram chats using Natural Language Processing (NLP), making it even more convenient and versatile.

    Stay tuned for the another blog post, where I’ll share the details of automating the misting system control. Get ready to take your greenhouse experience to the next level!

  • How I cleaned my Fish Pond

    Jun 7th, 2023

    Introduction

    One of the nicest features, in my opinion, to have in a garden is a fish pond. Watching the fish swim around, caring for them, and feeding them is a great way to destress. So when we were planning to buy a home, I always had it in mind that we would build a fish pond in the garden. As luck would have it, the home we purchased came with a small fish pond that already had two small Japanese Koi fish.

    At first, I simply fed the fish without doing much else. However, after about four months in our new home, I began gardening extensively. As I spent more time in the garden, I realized that the water from the fish pond could be used to water my plants. That’s when I discovered just how dirty the bottom of the pond was. As I dug deep into the pond, the water turned dark green due to the accumulated algae at the bottom. With summer approaching, I decided to turn the pond into a feature and took on the task of cleaning it myself.

    Draining the Water

    Initially, I tried using a pond scoop net to remove the algae, but I only managed to get rid of a small amount. Every time I removed some algae, the rest scattered around, making it difficult to remove a significant portion. That’s when I decided to drain the water from the pond so that I could access the algae at the bottom more effectively. However, I didn’t want to waste the water because fish pond water contains beneficial minerals like ammonia (NH3) from the fish waste, which is good for plants. I took my time watering my plants with the pond water, especially the greenhouse and grow bed, which had become dry from lack of use. After a couple of weeks, the water level in the pond had significantly decreased, making it easier to see and access the fish.

    Pond after draining the water

    Moving the Fish

    With the water level low, the fish became stressed as their movement became restricted. The next step was to move the fish out of the pond and into my old baby bathtub, where they would have more space to swim. I also added a small pump to the bathtub to help aerate the water until I was ready to move them. I couldn’t imagine how long the fish had been in such dirty water, so I was determined to help them improve their condition.

    Fish in bathtub

    Disposing of the Algae

    Now that I could access the algae, it was time to remove them from the pond and dispose of them. Since I didn’t have a pond vacuum or any specialized equipment, I improvised using a rubber-ended sweeping packer. With it, I was able to scoop out a significant amount of algae, which turned out to be quite abundant and smelly. I collected the algae in a bowl, wondering where to get rid of them. The algae I scooped out contained lots of organic matter that could be beneficial to plants. For example, the smelly part was due to Hydrogen Sulphide (H2S), which, in moderation, can also be good for plants. I decided to bury some of the algae in the soil of my greenhouse to help retain water and some in my grow beds. However, there was still a significant amount left. Fortunately, there were some large drums of soil left behind by the previous owners, which I had been using to grow vegetables. Unfortunately, the soil had become hydrophobic. That’s when I saw the algae as a solution to this issue. I simply poured the remaining algae and water into these drums of soil, thoroughly mixing them to ensure the algae was evenly distributed throughout the soil. The after-effects of this process will be the subject of another blog post, but suffice to say, it was a success.

    Cleaning the Pond

    With the fish and algae out of the way, I could now focus on cleaning the pond thoroughly. I started by using a water jet to remove the thick strands of algae stuck to the walls of the pond. I repurposed a broken sweeping brush for gardening and used it to clean the lining of the pond. Throughout the process, I used the packer to remove the dirty water from the pond, which I simply disposed of in the garden. I avoided using any chemicals, as it is essential not only for the pond but for the entire garden’s health.

    Conclusion

    When keeping live pets, it is important to maintain clean and tidy environments for their well-being and our own. This is especially crucial for me as I have children, and I want their surroundings to be as neat as possible.

    The entire process of cleaning the pond was highly satisfying, and witnessing the final result was truly remarkable. I will share another blog post about the new setup I am currently working on, which includes installing a fountain with a pump, underwater lights, and integrating a control system. I look forward to completing this project and sharing the details. Until then, Godspeed.

1 2
Next Page→

Blog at WordPress.com.


Loading Comments...
 

    • Subscribe Subscribed
      • Gardening, Tech and DIY
      • Already have a WordPress.com account? Log in now.
      • Gardening, Tech and DIY
      • Subscribe Subscribed
      • Sign up
      • Log in
      • Report this content
      • View site in Reader
      • Manage subscriptions
      • Collapse this bar